Pages

Showing posts with label Easy Vegan. Show all posts

Wednesday, March 6, 2013

Sweet and Sour Sauce

Chinese... we love Chinese! My only problem is the Mono sodium Glutamate, or MSG, abundant in all Chinese food we can purchase at any take-away.
I wrote about this scary "ingredient" before, here. I have since learned how to make at home two of our favorite sauces, the Lemon Sauce, and the Sweet and Sour sauce. They have entered now our regular menu and my son jumps around and celebrates every time I make it :) He is an easy please child, I admit it!

Now, the Sweet and Sour sauce I've made many times, hence I have found a beautiful balance with the ingredients to make it just as we like it best.

Ingredients:

60 grams of tomato sauce

200 grams of water
120 grams of white vinegar (I've used the Apple vinegar and the Pineapple vinegar I made myself)
90 grams of sugar, possibly brown
1 tablespoon of corn starch, not essential but it will thicken the sauce if you like
1 slice of pineapple if you have, cut in small chunks, it gives it a superb twist

There are no pictures for this because it's so easy to make.

Add all the ingredients to a small pot and bring to the boil. Turn the heat to a minimum and simmer for 10-15 minutes.

Ready!

Monday, October 15, 2012

Rice Gnocchi - my style

It's been a long time since I've posted a recipe, I've been experimenting a lot lately, not only in the kitchen but also with paper and scissors and my son is turning into a crafty little man with his enthusiasm. He loves now to make things, mostly tridimensional things, with paper and glue and glitter and any object he can find loose around the house.
The main experiment in the kitchen has been in the bread compartment. I have succeeded using a US recipe posted by an Italian friend on facebook... That says it all. The recipe is super easy, especially for me. I cannot knead too much now, being 7 months pregnant and a bit short of breath at the moment. The bread made with this recipe came out very well, and I will definitely be posting it soon, because it is super easy and it worked so well for two times in a row, without any "first time failure".

Today I'll be posting about a special kind of gnocchi, Rice Gnocchi. In Italy, we used to have them often in the CHinese restaurant, however I've never seen them on any menu here in Ireland and I know my husband loves them. He didn't eat them for the past five years, but now I know how to make them myself so he's a very happy bunny :)

Ok, the word gnocchi is not too accurate, they look like slices of rice dough, but in the Italian Chinese restaurant that is what they are called, so we'll stick to that.

Ingredients:

100 grams of rice flour for each person
50 grams of plain flour for each person
100 millilitres of water for each person.

Measure the flours.
And place them in a bowl.
Mix in the water and knead until you get a nice dough ball. If needed, add a bit of water.
Let the ball rest for 30 minutes or more in the fridge, so it firms up a bit. I left it for over an hour and it was a pleasure to work with when I took it out.
Cut a thin slice of the dough and press it down on a wooden board, then cut it in the desired shape. It should look like an ellipse, bit I didn't have any elliptical cookie cutter at hand so I just cut them in stripes.
Place all the stripes obtained on the side, and do not flour them  at all, otherwise the gnocchi might be a bit harder than what they are intended.
Prepare your condiment. For us it was chicken breast, slowly cooked with some olive oil and soy sauce, along with mushrooms, peppers and courgettes pieces. It is important that the condiment cooks slowly, so it can release the juices needed for the gnocchi.
Once the condiment is ready, put on some salted water and cook the gnocchi in batches of maximum 10 for two minutes in boiling water. 

Remove with a strainer after the 2 minutes and place over the condiment in the pan.
Once all the gnocchi are in the pan, stir fry everything for a few minutes turning and turning the contents so all the gnocchi get the chance to come in contact with the sauce.
Serve warm and enjoy. They are not heavy to digest and needless to say my 5 year old son loved them!

Monday, September 24, 2012

Filled Aubergines

It's been a long time since I last posted a recipe. We have been busy with the beginning of our son's school career :) and I have enjoyed playing with my sewing machine more than with pots and pans for last few weeks. We are also... well I am also preparing everything for the new baby that will complete our family, hopefully in December.

So, filled aubergines. I love aubergines, my son a bit less, but he needs to taste things before he can say he doesn't like them. So I tested the aubergine.

Ingredients:

3 Aubergine's halves (I used a 4th half to cook Pasta alla Norma)
1 Breast of Chicken, cut in small cubes
1 Small Onion
10-15 Black Olives
1 glass of White Wine


Remove the inside of the Aubergines and cut is small pieces. Place them in a non stick pan with some Olive Oil and let them cook for about 5 minutes. You will see a bit of liquid will come out. Add the Chicken pieces and the sliced Onion and let the aubergine's water evaporate for a few minutes.


Add salt and pepper to your taste and make sure all sides of the chicken are white. At this stage, add the Black Olives and the glass of White Wine and let cook on medium heat, covered.

When you are satisfied the chicken is properly cooked, remove the pan from the heat and fill the Aubergines halves
Place the filled Aubergines in the same pan with the juice left from the filling cooking and let simmer on medium heat, covered, for 20 minutes. Check that the juice is still there from time to time. If it dries out during the cooking, add a bit of Wine or water.
Serve and enjoy! 
This is a very versatile recipe, meaning that you can cook any filling you like and the aubergines will still absorb the taste of it and be super yummy. You ca blend the filling so it becomes an even mixture, add cheese on top, tomato sauce instead of the wine... it's up to you, and the contents of your fridge :)


Monday, August 27, 2012

A Busy Weekend - Calzone

From now on, whenever I cook a pizza I will also throw in a Calzone... It's just a great way to use the pizza dough, but bear in mind it has to be a bit thinner when used to make Calzone, so to give the filling a chance to cook properly.

Now, what I found great about Calzone is that the filling keeps its moist and doesn't "burn" like the topping on a pizza.

The first and most important thing that I learned making pizza dough over the last couple of years is that it has to be quite sticky when you put it to raise. Once raised it becomes a light material in your hands and not too heavy on the digestive system.

The trick is to cover your hands in flour before "handling" it, so that it can be worked with ease.

In a non stick pan I placed some olive oil, some mushrooms, broccoli and ham pieces. When the oil started frying, I threw in some white wine and let that cook for about 10 minutes on low heat.
I placed the filling in the middle of the Calzone and topped with some pieces of Port Salut cheese.
I folded the Calzone on itself and rolled the sides up, so the cheese, melting in the oven, would not leak out of it. I also pressed the borders with a fork.
In the oven he goes at 200 degrees Celsius and out it comes in about 7 minutes.


The nose you see in the picture on the right is my son's, who suddenly was interested in broccoli and ate half of my Calzone last night :)

For a vegan version, just leave out the cheese and the ham. It tastes just as good.

Tuesday, August 21, 2012

Turmeric Crackers - Love, love, love...

Yesterday I found a recipe for Turmeric Crackers on Facebook... I thought it was genius! We only eat turmeric - this wonder spice - when cooking oriental style rice dishes. It's not enough, because this spice is linked every day to new beneficial effects and, oh, it makes things taste good! Not to mention the interesting color :)
So, last night, after work and a bit of shopping my son and I made these crackers.

Ingredients

600 grams of Plain Flour
140 ml of Olive Oil
100 ml of Water
100 ml of White Wine
4 spoons of Turmeric
4 good pinches of Salt
2 pinches of Paprika

Mix everything together and you'll get something that looks like this:
Keep kneading for a few minutes until it looks like this:
Cut out a small piece and work it with your rolling pin:
Keep working until you obtain a nice thin sheet of this goodness-filled dough:
Cut as you please once on the baking paper:
Place in the oven at 180 degrees Celsius for about 15 minutes. Take them out:
With the ingredients above you'll get two of these boxes:
Total working time? About 30 minutes! They are virtually fat-free, totally yeast-free and absolutely good for you! Enjoy!!!

Monday, July 30, 2012

Gnocchi - Picture Tutorial

I make gnocchi quite often, mainly for three very good reasons: they are super cheap to make; they are ready in no time; they only require two ingredients that I always have in the house.


Plain Flour
Potatoes


Now, the measurements here are quite difficult. Let's say that for 4 adults eating you will need 1 kilo of potatoes. The amount of flour I could really not tell, because you have to keep adding it to the mix until it feels right. The amount of flour mostly depends on the type of potatoes being used. So far, any potato has worked fine for me.


Now, here is the procedure step by step:


Boil the potatoes until cooked, just as you would do if making mash potatoes. If they are quite big, cut them in cubes before boiling.
Once ready, drain and place 2 cups of flour on your clean worktop. Don't worry, it won't stay that clean for too long :)
Place the potatoes on top of the flour:
Mash them with a fork:
This is what you have now:
Start folding in the flour, your hands will get stickier and stickier:
Keep kneading the mix until it becomes a ball like this. Also keep adding flour as needed.
Keep working and adding flour:
Add the flour until you can actually press with your fingers into the mix and this does not stick to them anymore:
Now that you have the mix ready, cut a piece from it and roll it into a long sausage, the thickness should be a bit more than your own finger.
Start cutting pieces out of it with a plain knife, and throw them in a tray with flour in it:
Make sure that you have all sides of each gnocco covered in flour so they don't stick to each other:
Have ready a tray where to cover them in flour and another tray where to settle them:
And this is the final result:


Now, gnocchi are easy to cook. Boil a big pot of water with salt, if you wish, and just toss them in. Turn them gently once or twice just to ensure they don't stick to each other. Once they start surfacing, they are ready to drain and dress with your favorite sauce.


A very simple option is to add butter on top of them and some sage in leaves or powder. They are magnificent this way.


Another option is to prepare a very simple tomato sauce, just basil and garlic and use that one. Make sure the sauce is quite liquid by adding water to it while it's cooking: gnocchi tend to absorb a lot of sauce.


Try it out, once done never forgotten, like the bicycle story. And it's not a lot of work at all.


If you want to make more than necessary, or if it just happens that you make more than necessary, they can be frozen. Place them well separate from each other on a tray, cover with a plastic bag and in the freezer. Once frozen, they can be "reunited" without any problem and kept for a good while.


Monday, July 23, 2012

Leftovers - My favourites!

Whenever I get to use that last slice of ham or those poor piece of courgette that just did not find its way in any other dish before they become rotten, I'm a happy person!
I hate to see waste; especially food wasted, it breaks my hearth. 
My husband just this morning was "giving out" to me because he says I dread the worst to happen. Well, I admit it, I do! That's why saving and avoid wasting (money, food, water, heat) are so important to me.
We live a very fulfilling life, nothing is ever missing from our table (unless we forget to buy it!) or our lives. Our son's Christmas is full of presents and his clothes always clean, and despite my habit of saving here and there, he is the happiest child I know. That's important.
I also remember well from my childhood, and generally from the part of my life spent under my parent's roof, how much tastier some foods were the next day.
Now, on Saturday I was on my own for lunch, husband busy playing soccer (or so he says...) and I desperately craved pasta!!! With no actual will power to make a proper sauce, I opened the fridge and found the 


Ingredients:


3 mushrooms
1/2 onion
3 slices of Salami
4 Cherry Tomatoes


Olive Oil
Salt and Pepper
Pasta


I put the water on for the pasta, with some rock salt as usual. In a non stick pot with a bit of olive oil, I placed the tomatoes split in half, the sliced mushrooms and onion and the salami cut in little pieces. I threw a bit of salt on them as well and put a cover on.
By the time the water was boiling and it was time for the pasta to go in, the topping was almost ready.
The cooked pasta was then drained and mixed, on medium heat in the non stick pot, with the topping, and here is the result:
Very, very enjoyable indeed! By leaving the salami out, it's a completely vegan dish.


Friday, July 20, 2012

Vegetable Stock Cubes!!!

I need to confess: I'm a huge fan of vegetable stock. This means that, twice a week during the whole Winter when my husband is out playing soccer, Yuri (my son) and myself, will have a simple warm pasta soup, cooked with just vegetable stock and topped with grated parmesan cheese. That's it! I love it, it reminds me of the long evenings my mother and I spent at home while my father worked the late shift in the car factory.
Yesterday I read an article about MSG, monosodium glutamate. It sounds like a poison. And chances are, it's not healthy. IKEA removed it from its foods sometime last year, and they are always ahead in these things, so well, I am going to remove it too. I am pregnant at present, and I don't want to feed myself and, now, my two children anything unhealthy.


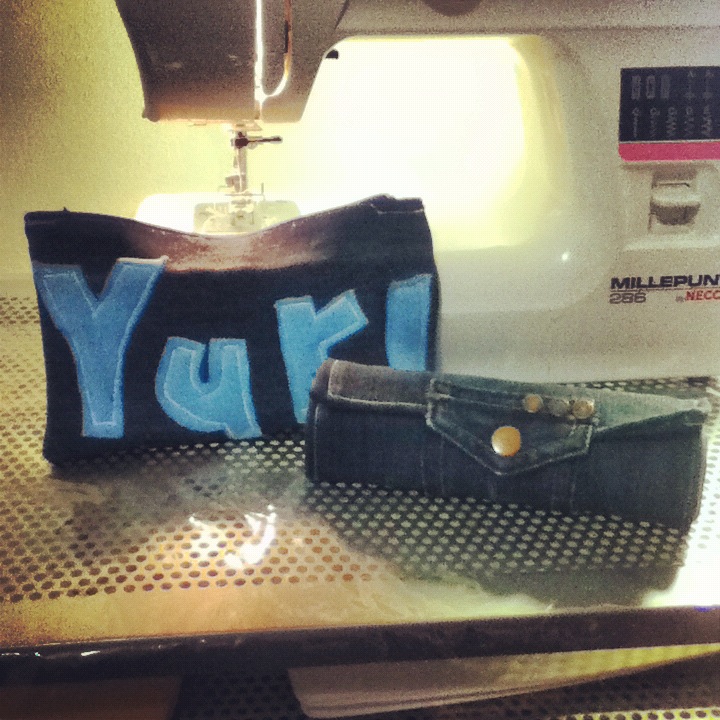
MSG is present in many vegetable stock cubes so I decided to make my own cubes with salt and vegetables. And no weird stuff in it. The procedure is super simple and, as usual, the thing cooks itself giving me the time to make my son a pencil case and a holdall for school at the sewing machine.


Ingredients for 56 cubes:
1 Courgette
1 White Onion
3 Carrots
10 Cherry Tomatoes
A small bunch of Parsley
2 small sticks of Rosemary
2 stalks of Celery
500 grams of Rock Salt


Some of the ingredients, peeled and washed


Peel, wash and chop up the whole lot and throw it in a non stick pot.
Cover them with all the salt and place the lid on.
Let cook on low-medium heat for 90 minutes.
The salt will extract all the water from the vegetables, so there is no need to add any water. Once you like the look of the whole thing (it doesn't really look nice now, does it?) blend it all.
Once cooled, place all of the paste in the ice cube trays and freeze them.
I got exactly 56 cubes plus 1 which I left in the fridge to try tonight :)
Once the cubes are frozen, I'll place them all in freezer bags so they don't take up too much space.
And here's what I was doing in the meantime:
We're almost ready for the long winter that will soon be here. School gear an'all!

Tuesday, July 10, 2012

Curried Beans and Potatoes

With my great satisfaction, last night I dug up our potatoes. The investment was definitely worth it: this is what I got out of only 3 not-so-good-looking potatoes I buried in March.


 There are also peas and I'm very happy about those as well. I am slowly picking them day by day and adding to the freezer bag :)


Now, last night, I was so proud of my produce I had to eat some of it. I already had soaked a handful of Borlotti beans on Saturday, so they needed to be used as well. Fine, here is what I put together last night for dinner while also knitting and watching the last bits of a movie:


Ingredients:


A handful of Borlotti beans, soaked or out of the can
3 Potatoes
Curry Powder (mine was mild)
Straight to Wok noodles (mine were Udon)
A garlic clove if you like
Water


Place all the beans and the potatoes, washed and cut in cubes, in the pan with some olive oil and the garlic clove. Sprinkle with salt and curry powder. Let fry a bit then add some water


Let cook on moderate heat for at least 30 minutes, the beans take a while to cook properly, especially the soaked ones. The ones from the can will cook way faster, so keep an eye on them to make sure they don't over cook.


Keep adding curry powder and salt to taste, this is not rocket science so it depends how you prefer it.


Once the beans and the potatoes are ready, add the noodles, let them cook according to the instructions and serve.


So fulfilling, so easy and fast and no animal proteins in sight!

Thursday, June 14, 2012

A Single Fruit Goes a Long Way - Pineapple Vinegar

Two days a go I found a good offer on pineapple and I bought one. I love pineapples, especially now that I know NOTHING goes to waste with these amazing fruits.
I washed the pineapple, under running water, making sure to rub well its rough and aromatic skin. I chopped off the top and put it aside, not in the bin. I peeled the fruit with a knife and placed all of the skin in a large jar with a 1/4 cup of sugar and 1 litre of water (I let the water air all day in a jug, to make sure the chlorine evaporates). I covered the jar with a tea towel and it will stay on my kitchen counter for at least 4 weeks. I'll stir it everyday to make sure oxygen gets in and the yeasts in the air can have their beneficial action. Once I filter the vinegar, I'll post new pictures. Forn now, it looks like this:

I also kept the top. I placed it in a small coffee cup with water hoping it will soon grow roots. We'll see. If it does, we'll have a nice indoor plant soon and an actual pineapple in 2 years :)
Updated: Here is the vinegar filtered and bottled. I'm very proud. I used it to make a yummy Tomato Relish as well...